
Some WordPress theme designers create their theme with quite a few sidebar widget areas and other may just include one or two.
What if your current theme only supports one primary sidebar widget area and you’re looking to add another; would you be able to extend the capability of your theme’s function? If this is you, this post will effectively show you how to achieve this within WordPress in a few minutes.
The first thing you will need to know is how to navigate to the files we will be editing to achieve our goal. There are two files that need to be edited and these are the function.php and sidebar.php.
We’re running WordPress from a local server and using the WordPress default theme Twenty Eleven to create this tutorial.
Registering Additional Sidebar Widget Area
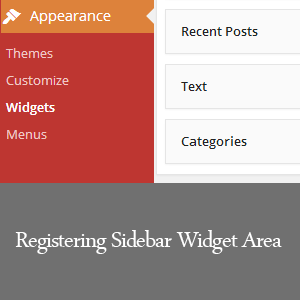
Let’s login and gain access to the WordPress backend and navigate to Appearance >> Editor then clicks editor to access your theme files. This area should show you all the files that make up your blog’s theme.
Scan through the list of files displayed on the right and locate and open function.php then copy all the code and paste it in an editing tool of your choice to begin editing. If you don’t have a code editing software, notepad will work just fine.
Once you’ve finished copy and pasting the code, find the piece of code that looks identical to the one below. Now copy the code then make a space below it to allow room for the registration of our new sidebar area.
register_sidebar( array(
'name' => __( 'Main Sidebar', 'twentyeleven' ),
'id' => 'sidebar-1',
'before_widget' => '<aside id="%1$s">',
'after_widget' => "</aside>",
'before_title' => '<h3>',
'after_title' => '</h3>',
) );
There are two steps remain to complete this part of the tutorial which brought us to naming the sidebar and defining its identity. To do this, find these two pieces of code ‘name’ => ( ‘ ‘ ) and ‘id’ => ‘ ‘ then rename the current name inside the quoted marks to one of your choices so WordPress can differentiate between all sidebars. If you’ve done this correctly your new code should look exactly like the one below and that will conclude our editing in function.php.
register_sidebar( array(
'name' => __( 'Main Sidebar Custom', 'twentyeleven' ),
'id' => 'sidebar-5',
'before_widget' => '<aside id="%1$s">',
'after_widget' => "</aside>",
'before_title' => '<h3>',
'after_title' => '</h3>',
) );
Note: You must choose the number “5” or above for your new sidebar id to prevent conflict because id 1-4 is already in use.
At this point, we’re now ready to save, copy and replace the entire old function.php file with our new one. Upon completing this go to Appearance >> Widgets and look to the right, there you should see our newly registered sidebar widget area ready for use.
The sidebar as it stands now is functional for widgets but can also make it configured to display custom codes for whatever you would like to have it display. This brings us to sidebar.php the second file we need to edit as mention previously above.
Again, navigate to Appearance >> Editor if you don’t already have it open and find sidebar.php on the right and open it. Make a copy of the code and so you could begin editing. Always make a copy of any theme files before doing and customization in the event something goes wrong you can always revert to the original code.
With sidebar.php open find and copy the following pieces of code, put them together as shown below and place it right after the primary sidebar ending code.
<?php if ( ! dynamic_sidebar( 'sidebar-1' ) ) : ?>
<?php endif; // end sidebar widget area ?>
Now change sidebar-1 to sidebar-5 to correspond with the id we registered earlier in the function.php file. If you have custom code for anything you want to show in your sidebar go ahead paste between the two pieces of code. If not save as is and replace the old sidebar.php code with the new one and save again.
Add a few widgets to the new sidebar, save and refresh your browser to see the new changes.
We hope this article helps you register an additional sidebar widget area within your WordPress theme. For feedbacks and questions regarding the post leave us a comment or reach us on Twitter @Webberways